

How To Change A Headlight On A 2010 Nissan Sentra
Nissan Sentra Headlight Bulbs Replacement Guide
How to change a depression / high beam, turn signal or side marker low-cal seedling in a 6th generation 2007-2012 Nissan Sentra.
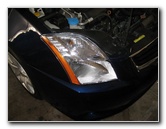
2012 Sentra Headlight
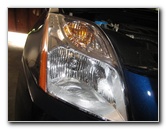
Plow Bespeak & Side Marker
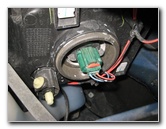
Base of Headlight Seedling
Owners of other Nissan vehicles such equally the Versa, Cube, Altima, Maxima, Leaf, Pathfinder, 370Z, Juke, Rogue, Xterra, Murano and Quest may likewise find these DIY instructions to be helpful.
Replacement light bulbs with their part numbers are as follows: Dual Depression & High Axle Headlight # H13, Front Turn Indicate # 3457A or 3457NA and Front Side Marker # 194.
No tools are needed to alter whatever of the bulbs in either the commuter or passenger side headlight housings.
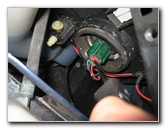
Pry Out Red Lock Tab
Press Release Push button
Pull Off Power Plug
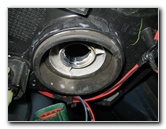
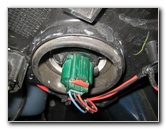
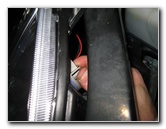
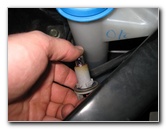
The combination Depression & High Beam (dual filament) headlight bulb is located almost the bottom of the headlight assembly.
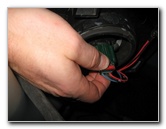
Reach in behind the headlight housing and locate the green plastic power connector on the base of operations of the old low/high beam bulb.
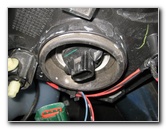
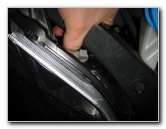
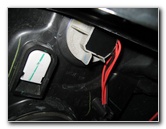
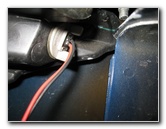
Utilise either your fingernail or a pocket-size flathead screwdriver to gently pry out the red locking tab on the ability plug towards the rear of the car.
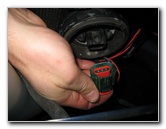
Then printing down the release tab on the electric connector and slide it direct off the base of operations of the onetime bulb.
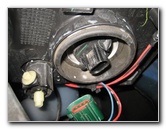
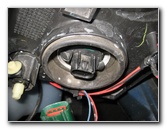
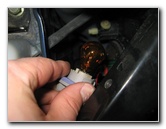
1/iv Turn Counter Clockwise

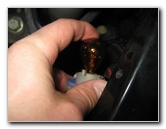
Pull Out Erstwhile Headlight Bulb
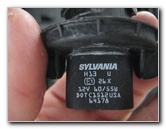
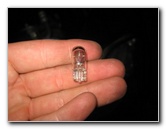
Sylvania H13 12V sixty/55W
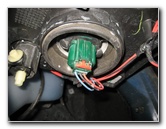
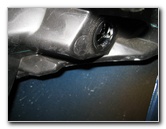
Empty Bulb Socket
Insert New H13 Bulb
1/4 Plough Clockwise - Lock
If you do get the new bulb dingy, wipe it clean with an booze moistened paper towel.
Insert the new # H13 bulb in to the socket and rotate information technology ane/4 turn clockwise to secure it in place.
I'd recommend using the Sylvania H13 headlight bulbs.
Push On Power Plug
Slide In Blood-red Locking Tab
i/4 Turn Counterclockwise
Pop in the red plastic locking tab on the top of the connector.
The front Plough Signal light seedling is located about the height inner corner of the headlight assembly.
Turn Signal Bulb Socket

Erstwhile # 3457AK Bulb
Push In New 3457NA Bulb
Pull the onetime seedling straight out of the socket and button in a new amber colored # 3457AK, 3457A or 3457NA bulb.
1/4 Turn Clockwise - Lock
Plow Signal Socket Secured
1/4 Plow Counterclockwise
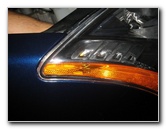
The forepart Side Marker light bulb is located at the top outer edge of the headlight assembly.
Achieve in backside the housing and rotate the minor light grey bulb socket 1/4 plow counterclockwise earlier pulling information technology straight out.
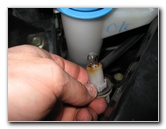
Side Marker Seedling Socket
One-time # 194 Seedling
Push In New # 194 Seedling
If necessary, you may also use whatever other miniature wedge base bulbs such as the # 168, W5W, 2825 or a compatible replacement 194 LED unit.
Side Marker Bulb Socket
1/iv Turn Clockwise - Lock

Test New Headlight Bulbs
Test the new bulbs past turning on the headlights, activating the hazard signals and flashing the high beams.
Be sure to record the seedling modify in your vehicle's service records.
For more, check out my other 2007-2012 Nissan Sentra Maintenance & Repair Guides.

Source: https://paulstravelpictures.com/2007-2012-Nissan-Sentra-Headlight-Bulbs-Replacement-Guide/
Posted by: georgewrond1958.blogspot.com
0 Response to "How To Change A Headlight On A 2010 Nissan Sentra"
Post a Comment